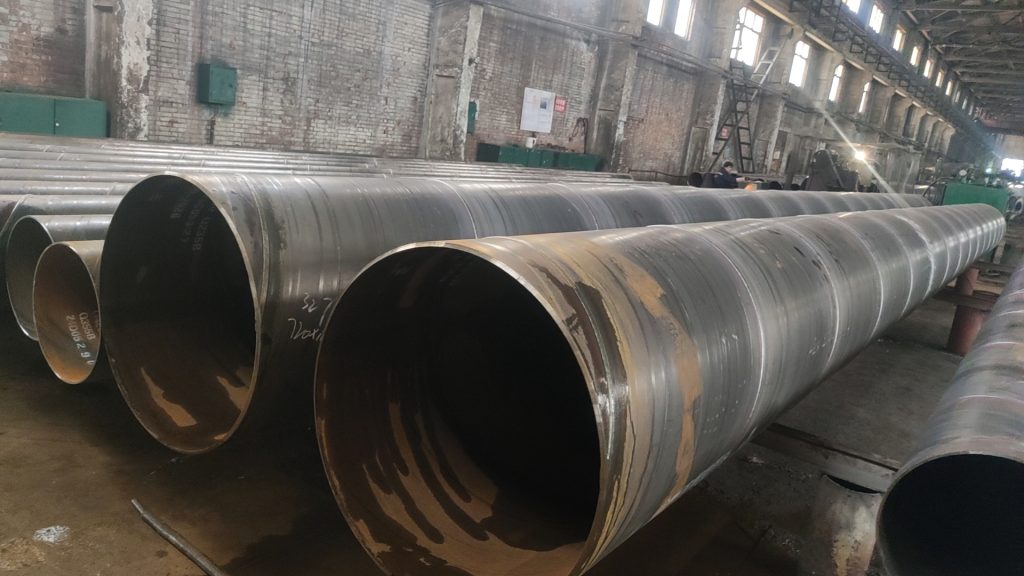
Due to its superior performance, spiral steel pipes are now widely used in various aspects such as electric power industry, agricultural irrigation, water supply projects, petrochemical industry, chemical industry, urban construction, etc. In order to prevent substandard products from circulating in the market and causing a lot of inconvenience to our lives , we need a unified detection method to monitor the quality of different spiral steel pipes. The editor will talk about the quality inspection methods of spiral steel pipes.
Spiral steel pipe is a spiral seam steel pipe welded by automatic double-wire double-sided submerged arc welding process using strip steel coil plate as raw material, constant temperature extrusion molding.

Spiral steel pipes should undergo mechanical performance tests, flattening tests and expansion tests before leaving the factory, and must meet the requirements of the standards. The quality inspection methods of spiral steel pipes are as follows:
According to the quality inspection results of spiral steel pipes, spiral steel pipes are usually divided into three categories: qualified products, repaired products and scrap products. Qualified products refer to spiral steel pipes whose appearance quality and intrinsic quality meet the relevant standards or technical conditions for delivery and acceptance; repaired products refer to appearance quality and intrinsic quality that do not fully meet the standards and acceptance requirements, but are allowed to be repaired and can meet the standards and acceptance conditions after repair. Spiral steel pipes; scrap refers to spiral steel pipes whose appearance quality and intrinsic quality are unqualified and are not allowed to be repaired or which still fail to meet the standards and acceptance conditions after repairs.
Judging from the surface, that is, inspecting the appearance. The appearance inspection of welded joints is a simple and widely used inspection method. It is an important part of finished product inspection. It mainly detects defects on the weld surface and dimensional deviations. Inspection is generally carried out through naked eye observation with the help of tools such as standard templates, gauges and magnifying glasses. If there are defects on the surface of the weld, there may be defects inside the weld.
Inspection by physical methods: Physical inspection methods are methods that use some physical phenomena to measure or inspect. The inspection of internal defects in materials or workpieces generally uses non-destructive testing methods. Non-destructive testing includes ultrasonic testing, radiographic testing, penetrant testing, magnetic testing, etc.
Strength test of pressure vessels: In addition to sealing tests, pressure vessels must also undergo strength tests. There are two common types: water pressure test and air pressure test. They can both test the tightness of welds on vessels and pipes operating under pressure.
The air pressure test is more sensitive and faster than the water pressure test. At the same time, the product after the test does not need to be drained, which is especially suitable for products with difficult drainage. But the test is more dangerous than the hydrostatic test. When conducting tests, corresponding safety technical measures must be observed to prevent accidents from occurring during the test.
Tightness test: For welded containers that store liquid or gas, the tightness test can be used to detect non-density defects in the weld seam, such as penetrating cracks, pores, slag inclusions, incomplete welding and loose tissue. Tightness testing methods include: kerosene test, water-carrying test, water flushing test, etc.
The strength of spiral welded pipes is generally higher than that of straight seam welded pipes. Welded pipes with larger diameters can be produced from narrower billets, and welded pipes with different diameters can also be produced from billets of the same width. The welds of spiral submerged arc welded pipes are distributed in a spiral and are long. Especially when welded under dynamic conditions, the welds leave the forming point before they have time to cool down, which can easily cause welding hot cracks. The direction of the crack is parallel to the weld and forms a certain angle with the axis of the steel pipe, generally between 30-70°. This angle is exactly consistent with the shear failure angle, so its bending, tensile, compressive and torsional properties are far inferior to those of straight seam submerged arc welded pipes. At the same time, due to the limitation of the welding position, the saddle-shaped and fish-ridge-shaped welds are affected. Beautiful.
In addition, during the construction process, the intersecting line welds at the joints of the spiral welded parent pipes split the spiral seams and generated large welding stress, thus greatly weakening the safety performance of the components. Therefore, the non-destructive testing of the spiral welded pipe welds should be strengthened. Ensure the welding quality, otherwise spiral submerged arc welded pipes should not be used in important steel structure situations. Straight seam steel pipes are welded under static conditions, the weld quality is high, the weld seam is short, and the probability of defects is very small.
Through full-length expansion, the steel pipe has a good pipe shape, accurate dimensions, and a wide range of wall thickness and pipe diameter. It is suitable for bearing columns of steel structures such as buildings, bridges, dams, and ocean platforms, ultra-large-span building structures, and structures requiring wind and earthquake resistance. Electric pole tower mast structure. Spiral steel pipe is a type of steel commonly used in industry, construction and other industries.

